Lower back pain was familiar to me before I ever set up a home office. A car accident in 2015 left my lower back quick to complain, and it complains most when I have spent a week sitting carelessly. When I moved my freelance technical writing into the spare bedroom in 2019, I assumed the pain came with the job: long writing blocks, three or four video calls, staring at one screen for six hours. The truth was less glamorous. I was letting whichever chair happened to be in the room decide how my spine sat for six hours, and it was a bad decision. Cushions shifted. A lumbar roll helped for a week. Standing desks left my hips aching and my deadlines untouched.
What finally helped was not one clever purchase but a sequence of adjustments on a chair that could actually make them. The chair I settled on is a GABRYLLY ergonomic office chair with a high back, a headrest, flip-up arms, and a tilt lock that holds you somewhere between 90 and 120 degrees. I have used it daily for six months, and the order of the adjustments matters as much as the levers themselves. Do them in the wrong order and you will spend all afternoon fighting the chair. Do them in the order below and the chair disappears under you. One honest note before the steps: I am a writer, not a physiotherapist, so this guide is about desk setup, not treatment. If your pain is sharp, constant, or running down your leg, please talk to someone qualified before you adjust anything.
Set your chair up in the right order and feel it tomorrow
The GABRYLLY ergonomic chair has a lever for every step in this guide: height, tilt lock, armrests, and headrest. It is the chair I have used in this room for the last six months. Check the current price on Amazon and see if your chair fights you the same way mine did.
Amazon Check Today's Price on Amazon →Step 1: Set the seat height with your feet flat
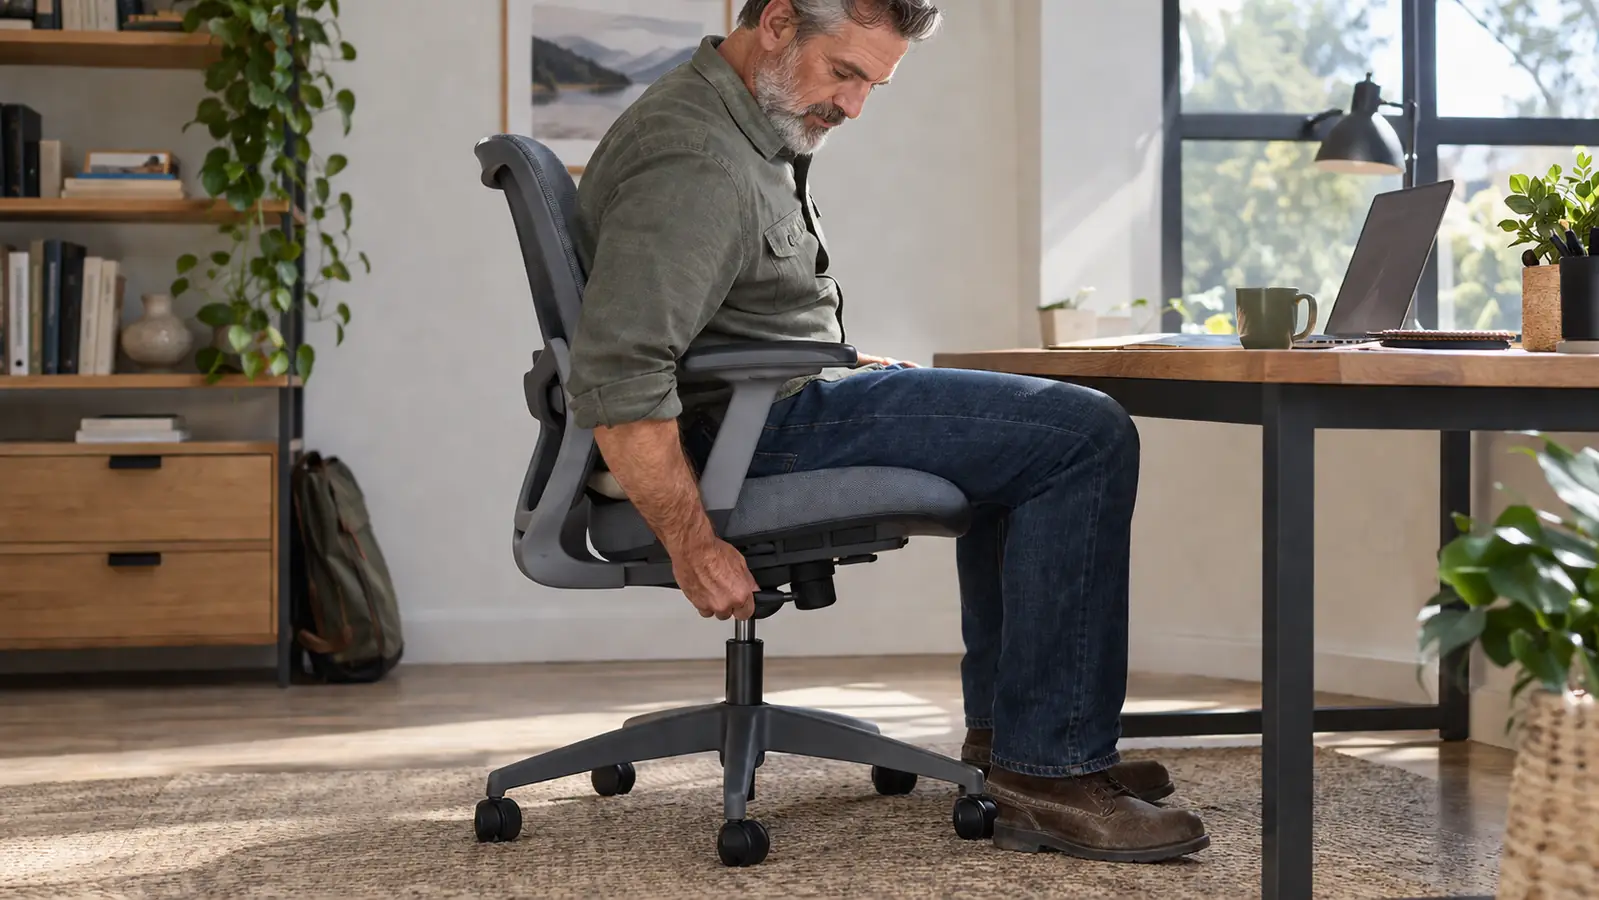
Everything else in this guide depends on seat height, so it comes first. Sit down, slide your heels back under your knees, and raise or lower the seat until your knees are about level with your hips. On the GABRYLLY, the height lever is on the right side under the seat and it works while you are sitting on the chair. If your feet dangle, the seat is too high. If your knees point up toward your chest, the seat is too low. You are looking for a middle position where your feet rest flat and your thighs slope very slightly downward.
That middle position matters because your lower back will do whatever your hips tell it to do. A seat set too high makes you perch and round your spine to keep your balance. A seat set too low pushes your knees up and tilts your pelvis backward, which flattens the natural curve in your lower back. Both feel like a chair problem, but they are really a height problem. I learned this the slow way during my first months in this room, when I sat on a folded blanket to get closer to my desk. The blanket shifted, the height was wrong again by noon, and my back let me know it had been moving all day.
Use the lever, not a cushion, and give yourself a full minute to settle after each change. Then test it: lean forward slightly and sit back down. Your weight should land on your sitting bones, not on the back of your thighs. Keep adjusting until you stop thinking about your feet. If you are thinking about your feet while you write, this step is not done.
Step 2: Set the seat depth so your knees move freely
Seat depth is the distance from the back of the seat to the front edge, and it decides how much of your thigh the chair supports. The healthy zone is about two finger widths of space between the back of your knee and the front edge of the seat. Too little support and your thighs carry weight that your skeleton should carry. Too much and the front edge presses into the back of your knees, which nudges you into a slouch as you try to get away from it.
My old kitchen chair failed this test completely: the seat was short and my thighs took the load, so my lower back worked overtime to keep me upright. The GABRYLLY has a wide cushion, which gives more forgiveness than a narrow seat, but the same rule applies. Sit all the way back in the chair and check the gap behind your knees. If the seat is too deep and the chair has no way to shorten it, you may need a small back cushion, positioned behind your lower back, to bring your pelvis forward. Do not use a seat cushion; that changes the height you just spent time setting.
You should be able to slide a flat hand, not a fist, between the front of the seat and the back of your knees. If your calves touch the seat when you move, you are too far forward. If your thighs feel pinched at the front edge, scoot back. This is not a judgment about your body. It is simply the geometry that keeps your pelvis from rolling backward for hour after hour, and it is often the step people skip entirely.
Step 3: Recline the backrest and lock the tilt into place
Here is the adjustment that made the biggest difference to me. For years I thought sitting up straight meant sitting at a stiff 90 degrees, with my spine doing all the work. The GABRYLLY changed my mind. Its backrest tilts back and locks, and I keep mine a few degrees behind vertical, enough that the chair carries a little of my weight instead of my muscles carrying all of it. A small recline takes some pressure off the discs in your lower back and lets the backrest hold your spine in its natural curve.
The lock matters as much as the angle. If the backrest can tilt freely while you type, you will brace yourself against the desk to stay put, and bracing is exactly what makes your lower back ache by late afternoon. Find the lock lever, usually under the seat or behind the backrest, and engage it once you are at the angle you want. I switch between two locked positions during the day, one for writing and one for video calls, and I use the lock every time. A chair that drifts is worse than a chair that is slightly too upright.
Test the angle by leaning all the way back and then relaxing your shoulders. If you feel the backrest behind your shoulder blades and your lower back in contact with the lumbar curve, you are in the right zone. If you feel like you are reaching forward for the keyboard, you have reclined too far. If you feel like you are sitting at attention, you have not reclined enough. Adjust in small steps; the comfort range is narrower than you would think.
Once the backrest started carrying part of my weight, my six-hour writing days stopped ending with a knot at the base of my spine.
Step 4: Set the armrests so your shoulders can drop
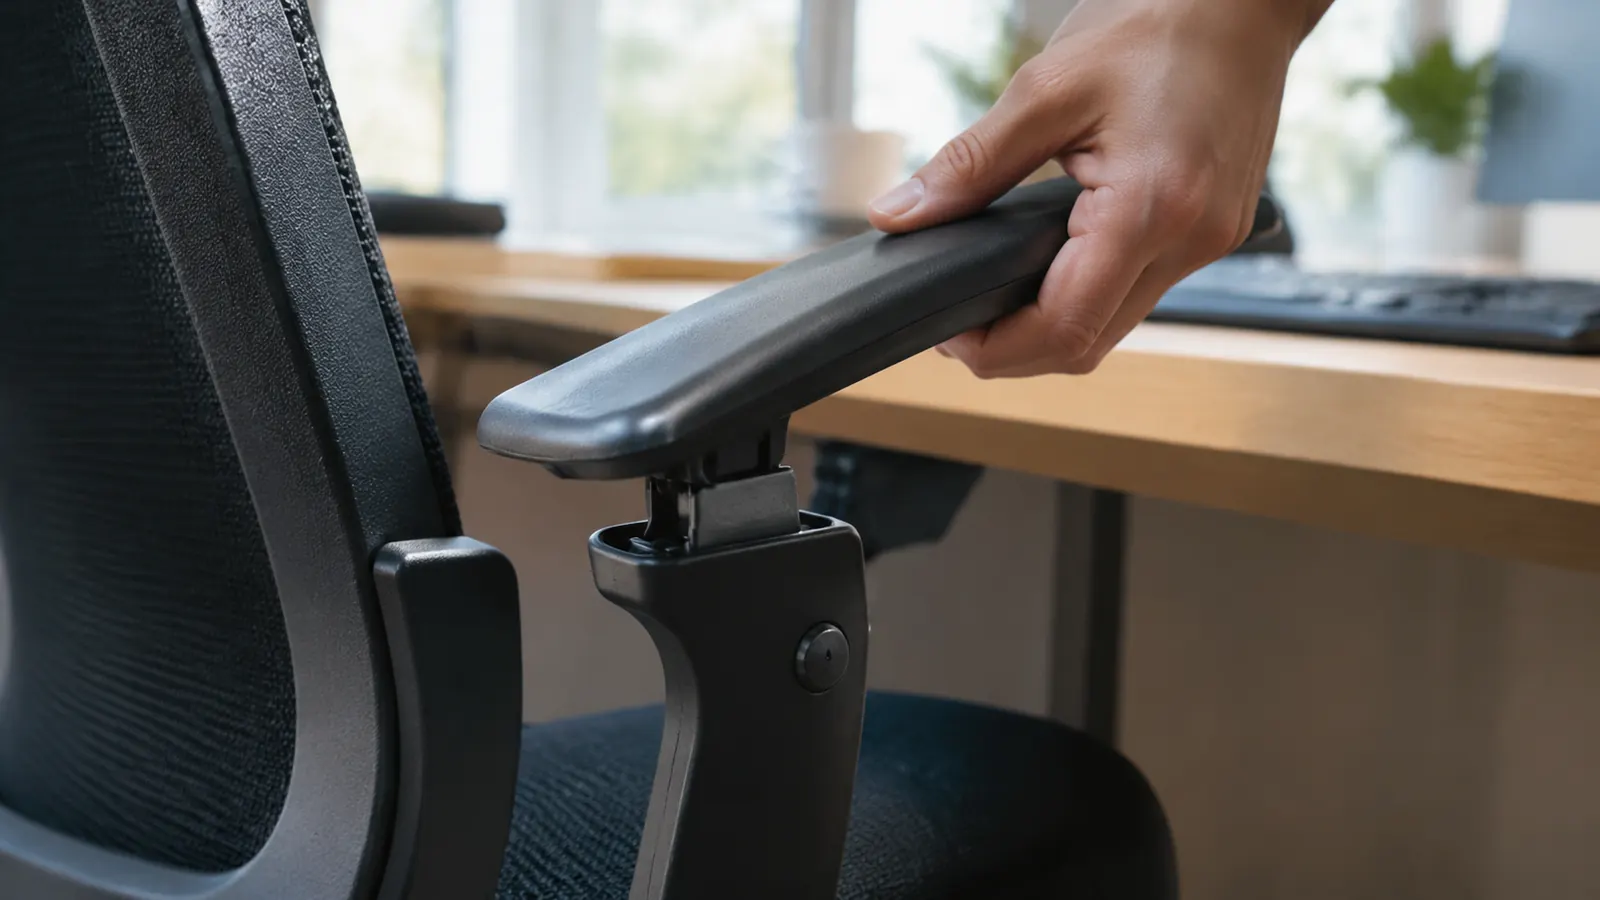
Armrests are the least loved adjustment on an office chair because most people never touch them. Touch them. Sit with your arms relaxed at your sides, bend your elbows to about 90 degrees, and raise or lower the armrests until they meet your forearms without lifting your shoulders. If your shoulders are up near your ears, your trapezius muscles are working, and by the end of a long writing day that work shows up as a knot between your shoulder blades and a stiff neck.
The flip-up arms on the GABRYLLY solve a specific home office problem that fixed armrests cannot: low desks. My desk is an ordinary one with an apron underneath, and at the height I needed, the armrests would not slide under it, which pushed me too far from the keyboard. Flipping them up let me pull the chair all the way in and rest my forearms on the desk surface instead. If you have armrests that get in the way of your desk, try them up for a week. You may find you never flip them down except to lean back and read.
Whatever you decide about the armrests, the keyboard should come to you, not the reverse. Place it so your elbows stay close to your body and your wrists stay straight. If you reach for the keyboard, your shoulders roll forward and your lower back follows them. If you have pushed your chair back to fit your armrests, your whole upper body leans toward the desk, and the armrest fix above is better than any wrist rest you can buy.
Step 5: Raise the screen and move the headrest out of the way
The last step is the one people notice first, because it involves the head. Your monitor should sit so the top of the screen is roughly at eye level, about an arm's length away. When I switched to a laptop on a stand and a separate keyboard, I stopped hunching my neck toward a screen that was eleven inches lower than it should have been. If you look down at your laptop for hours, your head will drift forward, and your neck and upper back will pass that tension down to your lower back.
Headrests cause more confusion than any other chair feature, and the GABRYLLY headrest is easy to misadjust. It is not there to hold your head while you type. It is there for the moments when you lean back to rest or think. If you push it forward so your head rests against it while your hands are on the keyboard, it juts your neck forward and gives you a headache by noon. Set it behind your head, at the height of the back of your skull, and use it deliberately: lean back, let your head settle into it, and take a real thirty-second break.
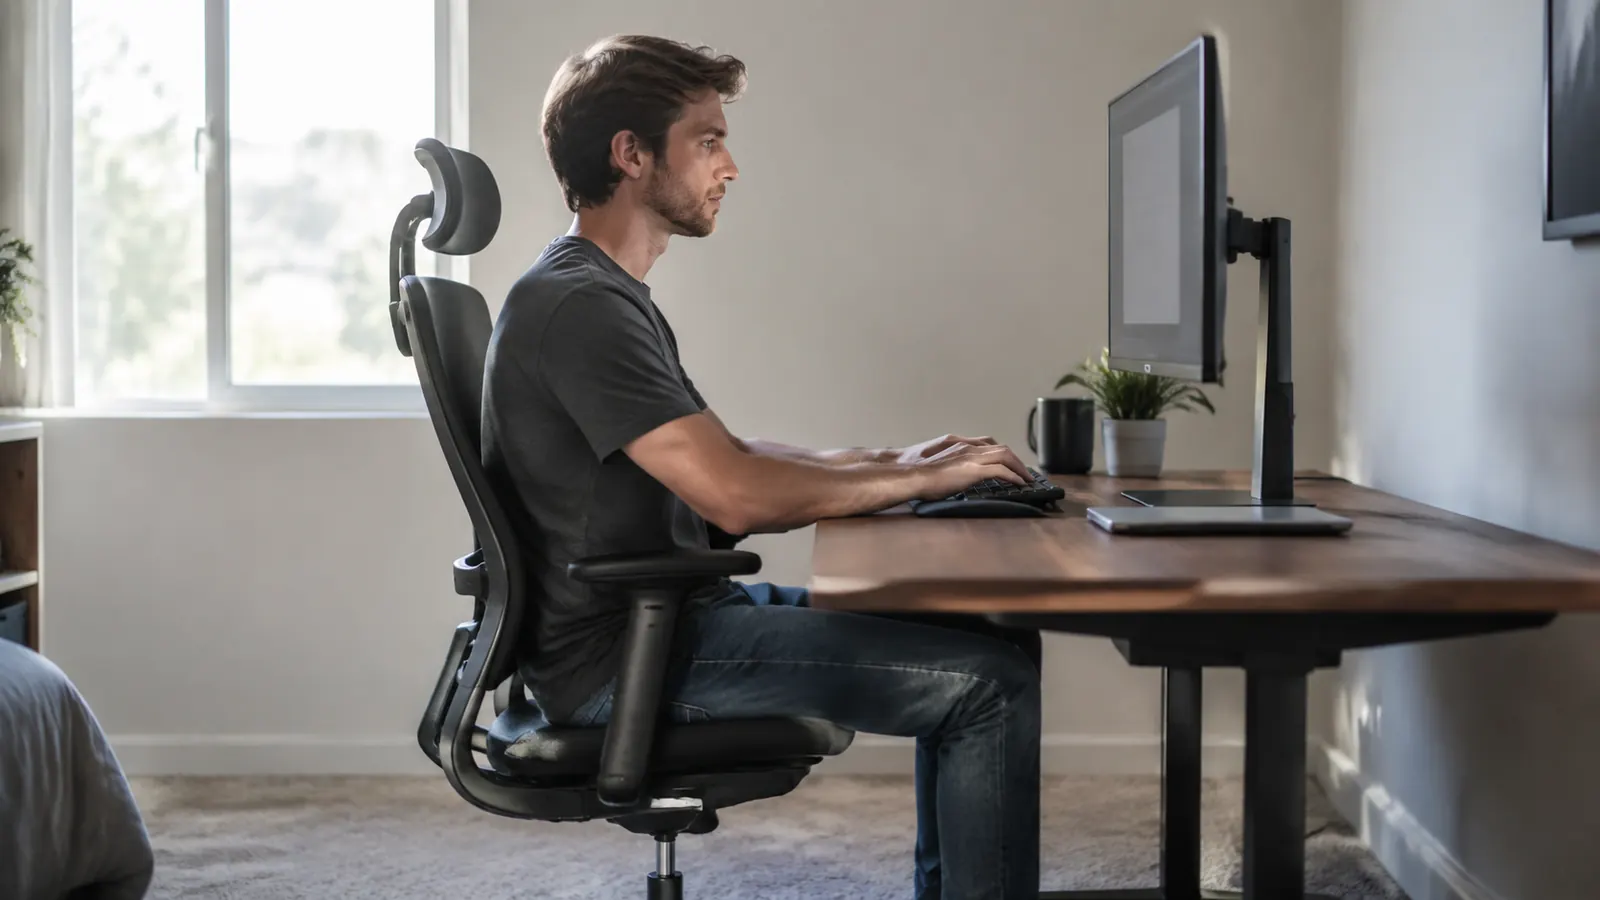
The test for this final step is simple: your ears should sit over your shoulders, and your shoulders should sit over your hips. When they do, your spine is in its neutral shape and your lower back is not being recruited to hold up a head that is somewhere out in front of you. This is the position to hold while you are typing, and it should feel easy, not forced. If it feels like work, recheck seat height and the backrest angle; your body is telling you one of the earlier steps moved.
What Else Helps
Correcting the chair gets you most of the way, but a chair cannot fix a body that never moves. The single best habit I added to this room is a two-minute break every hour. I do not set an elaborate timer or track my activity. I simply stand up when a writing block ends, walk to the window beside the desk, and let my eyes find something farther away for a moment. That is enough to unload my spine and reset my posture before I sit back down.
I also stopped treating my chair as the only answer. Stand up when you take a call, shift how you sit between tasks, and change positions through the day. Your body likes variety more than any single perfect posture. The levers on a good chair exist so you can move with the work, not so you can lock yourself in one pose for eight hours.
Two more things worth saying plainly. A good chair will not undo years of accumulated back trouble, and no piece of furniture replaces a conversation with a doctor or a physiotherapist when pain persists. What a chair can do is remove one avoidable cause of pain from your working day, and when your pain mostly comes from sitting, that is a long way toward feeling human again at dinner time.
Give your chair ten minutes tonight
You already have everything you need to start: a chair with adjustable height, a backrest that locks, and armrests that move. Run through the five steps the next time you sit down. When your current chair will not hold a setting and your lower back pays for it, the GABRYLLY is the chair I would order next.
Amazon Check Today's Price on Amazon →